


Knowing how to build a complete website is a duty of a Full Stack developer. However, that’s not enough given the current trend of technology these days.
Some clients may reach out to you as a so-called Full Stack Developer to build a complete software, let say a complete website, for them that would count from the domain registration, hosting service and the website development service itself.
Thus knowing how to host a website is a crucial benefit, especially on a reliable cloud platform with a reliable and easy-to-use control panel like Hestia CP.
Yes, that’s right. It’s Hestia CP. A few years ago, I’ve dropped a note here about how to install Vesta CP on Vultr, yet a few months ago, I found out that Hestia CP is a better option.
Why Vultr
Vultr (referral link, I earn a commission when you signup) describes itself as an ultra-reliable cloud platform that is within close proximity to the world’s developers. Founded in 2014, Vultr is on a mission to empower developers and businesses by simplifying the deployment of infrastructure via its advanced cloud platform.
Its service is strategically located in 17 data centers around the globe and provides frictionless provisioning of public cloud, storage and single-tenant bare metal.
I’ve been using Vultr for more than 5 years to host client projects and my own. I prefer Vultr over the other platforms because of its simplicity, ease of use, speed, technology and pricing.
Besides, there are several other cloud hosting providers on the planet for you to choose from such as Digital Ocean, Amazon AWS, Microsoft Azure and Google Cloud Platform, etc.
Why Hestia CP
If you’re a web developer, the term Control Panel is fairly common. They are used to assist in software deployment, email solutions, managing files, databases, DNS and backups, etc. There are lots of Control Panel software out there like cPanel, Cloud Panel, DirectAdmin, InterWorx, ISPConfig, Plesk, Webmin, Ajenti, ApisCP, My20i, aaPanel, Vesta CP, etc.
In fact, I’m not familiar with most of the above software mentioned, but I can assure you that Hesita CP is better, especially when you’re a software developer.
The thing I like the most about Hestia CP over Vesta CP is that, at the time of this writing, it supports up to Ubuntu 20.04 which means the software features are quite up to date, if not the latest, including, but not limited to, PHP, MariaDB, Exim 4, etc. The overall interface is similar to Vesta CP but with a compact design, clean and a more condensed view of information.
Furthermore, the Hestia CP development team is working hard to add commonly requested features like CardDAV/CalDAV/ActiveSync support for Contacts/Calendar and push synchronization on mobile devices plus support in Outlook clients, an updated webmail client that brings this new functionality to an easy to use but powerful interface, and much more.
One important aspect that I can’t ignore to mention is that Hestia CP provides a Lets Encrypt SSL support with wildcard certificates. This helps you install the HTTPS easier than before plus the redirect option that worries you no more about configuring your .htaccess redirection for SEO purposes.
In this article, I’ll walk you through how to deploy your WordPress website to the Vultr VPS cloud instance using a lightweight and modern control panel called Hestia CP.
Deploy a new Server on Vultr
If you don’t have an account on Vultr yet and you wish to follow along with this tutorial, you may create a new one using this link (please note that you’ll earn a $100 credit, and I’ll earn a commission when you sign up using that link).
Once you’ve logged in to your Vultr dashboard, go ahead and create a new server instance by clicking the plus + sign on the top right corner and choose Deploy New Server.
From Choose Server section select Cloud Compute (or you may try High Frequency). Tony explains so well the difference between the two options in his video.
From Server Location section select the one that nears to your visitors. For example, if most of my website readers are based in the US, I’ll choose New York (NJ) option. And if most of them are in Cambodia, I’ll choose Singapore.
From Server Type section select Ubuntu and choose 20.04 x64 from the option, since, as I mentioned above and as of the time of this writing, Hestia only supports up to Ubuntu version 20.04 LTS (LTS means Long Term Stable).
From Server Size I’d suggest picking the lowest-priced option first as Vultr allows you to expand it once your app/website is growing bigger and attracting more visitors. Please also note that the price also varies upon the location option you’ve picked.
Thus I’d recommend starting from a sandbox instance that costs you just $2.5/month or $5/month.
The cost is calculated hourly which means Vultr only charges from you as long as the instance stays, and if it gets deleted, the charge stops (Pay Per Use).
Skip other remaining options until you reach the last section Server Hostname & Label. Enter a short memorable name for your new server instance and click Deploy Now.
Wait a few minutes until your new server is up and running. You should see similar to the screenshot below when the setup is done.
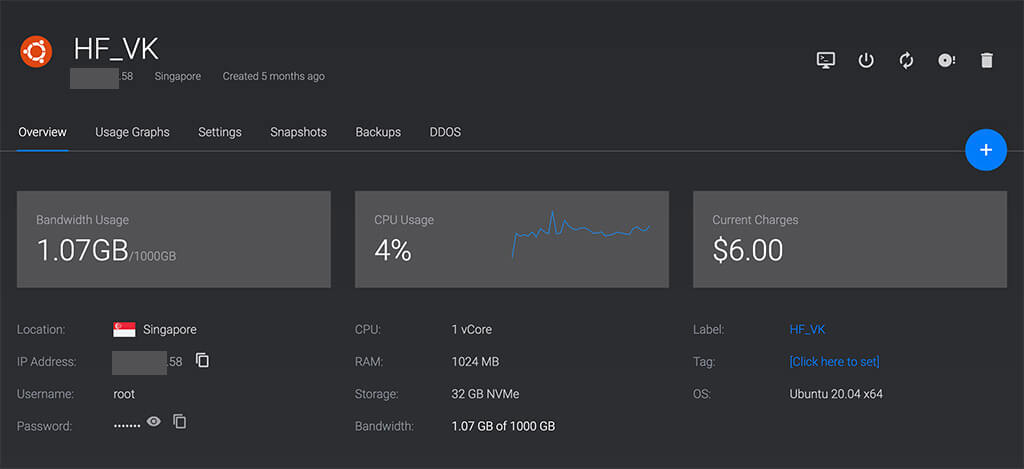
The most important part of the instance is the IP address and the root access for the SSH connection.
Install Hestia CP
Once your new server is up and running, open up your terminal (if you’re on Windows, GitBash is the best option for terminal access).
Connect to your new server by SSH using the IP and the root credentials provided above. For example,
ssh root@45.88.101.58Once you’re in, the first thing you’ll need to do is to update the package list for packages that needs to be upgraded and as well as new packages that have just added to the repositories, especially for the security reason. To do that, run the following command:
apt update && apt dist-upgrade -yTo enhance security on your server, the best practice is to add another user, grant the privilege as sudo and disable the root from getting access.
To add a new user, run the following command:
adduser daraIn my case, dara will be my new login name for SSH.
When prompting for a password, enter a strong one. Websites like Password Generator can help you create a tough one.
After that, add dara into the sudo group so that its privileges will be as strong as the root user. To do so, run the following command:
gpasswd -a dara sudoTo make sure your server is indeed secure, let’s disable SSH login for the root account. To do so, edit the sshd_config file
nano /etc/ssh/sshd_configChange the PermitRootLogin from Yes to No.
Then you must add the following configuration, otherwise, you won’t be able to login:
AllowUsers daraThe next step would be to create a swapfile [optional].
Swapfile enables us to increase the size of the default RAM amount provided by Vultr. It is the reserved file to help allocate when the default RAM space running out. First, paste in the following command:
dd if=/dev/zero of=/swapfile count=2048 bs=1MNext, activate the swapfile by running the following command:
chmod 600 /swapfileNext, tell the server to set up a swap file by running:
mkswap /swapfileThen turn the swapfile on with the following command:
swapon /swapfileThe last step is to enable the swapfile on reboot. First, open up the fstab file with the following command:
nano /etc/fstabThen paste in the following command, then save and quit by hitting Ctr+X, y.
/swapfile none swap sw 0 0We now come to the most important part of Installing Hestia CP section. Download the Hestia installer with the following command:
wget https://raw.githubusercontent.com/hestiacp/hestiacp/release/install/hst-install.shThen execute the installer file with the following command:
bash hst-install.shThen the instruction panel pops for the email address and FQDN (Fully Qualified Domain Name). I usually provide false information as Hesita will use them to create a default account login for me.
 _   _           _   _        ____ ____
 | | | | ___  ___| |_(_) __ _ / ___|  _ \
 | |_| |/ _ \/ __| __| |/ _` | |   | |_) |
 |  _  |  __/\__ \ |_| | (_| | |___|  __/
 |_| |_|\___||___/\__|_|\__,_|\____|_|

                      Hestia Control Panel
                                    v1.4.12


================================================================


The following server components will be installed on your system:

   - NGINX Web / Proxy Server
   - Apache Web Server (as backend)
   - PHP-FPM Application Server
   - Bind DNS Server
   - Exim Mail Server + ClamAV + SpamAssassin
   - Dovecot POP3/IMAP Server
   - MariaDB Database Server
   - Vsftpd FTP Server
   - Firewall (Iptables) + Fail2Ban Access Monitor

================================================================


Would you like to continue with the installation? [Y/N]: y <-- Type y or Y to confirm the installation
Please enter admin email address: YOUR EMAIL ADDRESS
Please enter FQDN hostname [hestiacp.cloud]: YOUR_SERVER_HOSTNAME
Wait for the installation to finish and you should see the login credential is created for you like below:
Congratulations!

You have successfully installed Hestia Control Panel on your server.

Ready to get started? Log in using the following credentials:

    Admin URL: https://demo.vannkorn.com:8083
    Username: admin
    Password: someV3ry$t0nGPassW0rd

Thank you for choosing Hestia Control Panel to power you full stack web server,
we hope that you enjoy using it as much as we do!

Please feel free to contact us at any time if you have any questions,
or if you encounter any bugs or problems:

Email: info@hestiacp.com
Web: https://www.hestiacp.com
Forums: https://forum.hestiacp.com
Discord: https://discord.gg/nXRUZch
GitHub: https://github.com/hestiacp/hestiacp

Note: Automatic updates are enabled by default. If you would like to disable them,
please log in and navigate to Server > Updates to turn them off.

Help support the Hestia Control Panel project by donating via PayPal:
https://www.hestiacp.com/donate
--
Sincrely yours,
The Hestia Control Panel development team

Made with love & pride by the open-source community around the world.

[ ! ] IMPORTANT: you must log out to restart the server before continuing.

Do you want to reboot now? [Y/N]
Hit Y to reboot the server in order to let Hestia CP works on your server.
I normally change the URL of the Admin URL that Hestia created for me to its corresponding IP address and open it via Firefox web browser. This is because Hestia CP will use a fake SSL certificate and some web browsers like Chrom will surely not let it pass.
Thus, in our case, go to https://45.88.101.58:8083 on Firefox, accepting the risk and continue. The following window will show up.
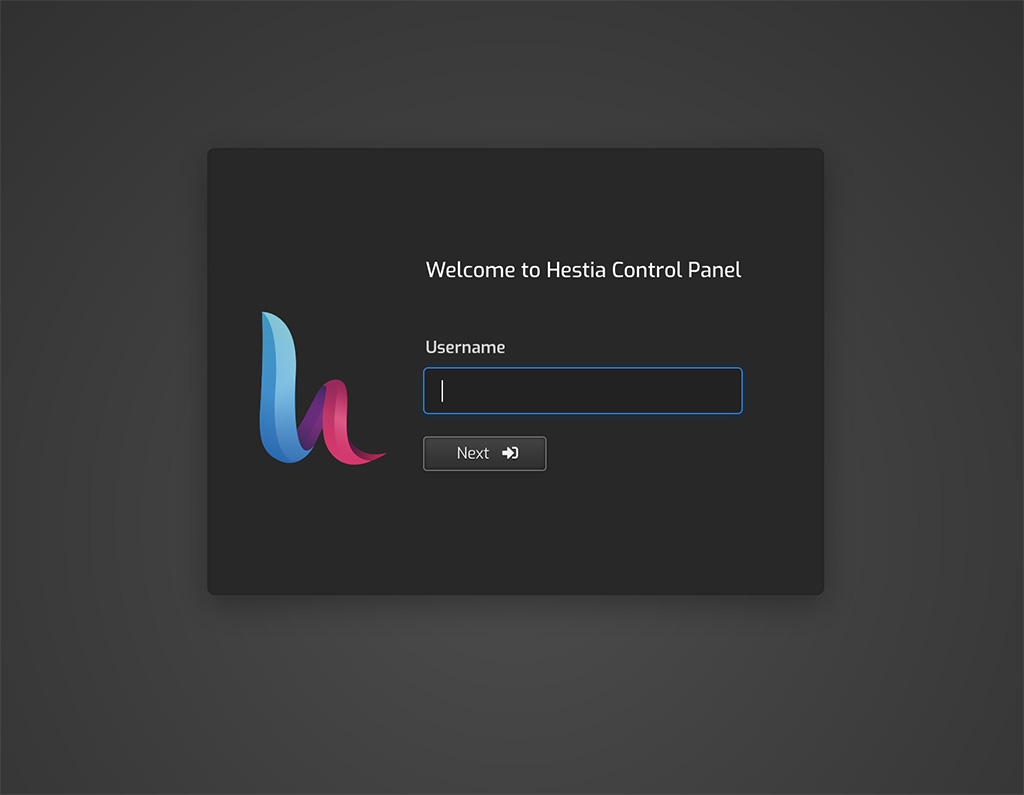
Go ahead and fill in admin as the Username and the password that it created for you earlier.
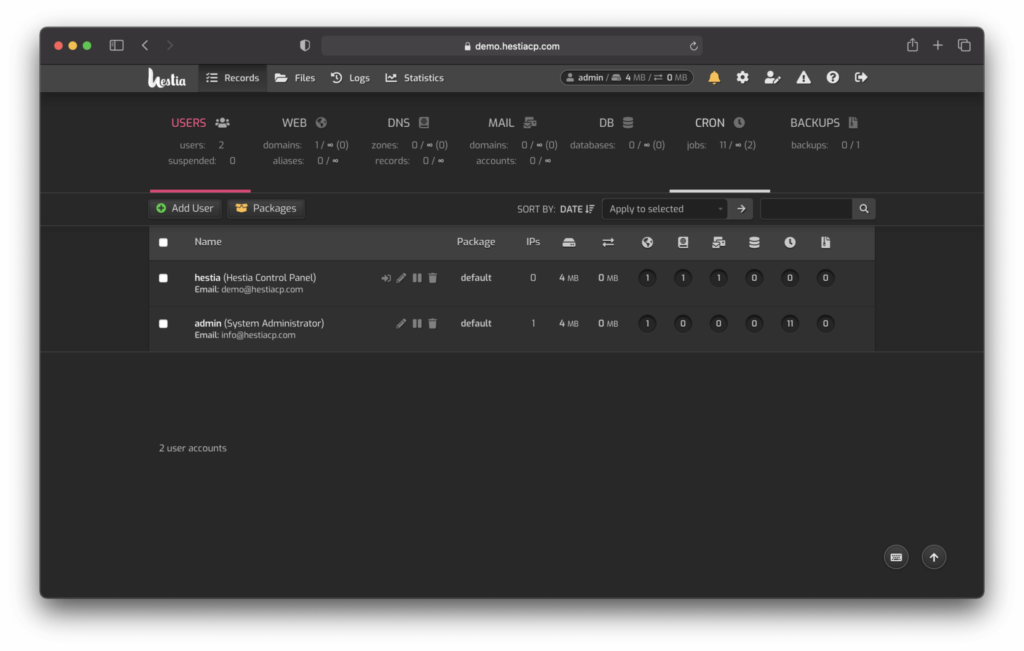
After successful login you will see something like the following screen:
The USERS tab enables you to manage every user on your current server. The WEB tab lets you manage every website assigned to each user, the DNS lets you manage the DNS configuration specifically for each user. The MAIL lets you manage email accounts and their corresponding configuration while the DB tab lets you manage the Database. I haven’t used the CRON tab before, but I’ll try out this feature in the near future ;).
The BACKUPS tab does the magic job. It automatically backups our files on a defined date. You can explore more about this option later. Please note that back up your files from here save you some bucks because the backup option provided by Vultr will cost you $1 extra every month.
I’d recommend creating a new user for every new app/website since it’s easy to manage and enhance security. You can increase the security level of the admin user by updating the current password to be stronger and longer.
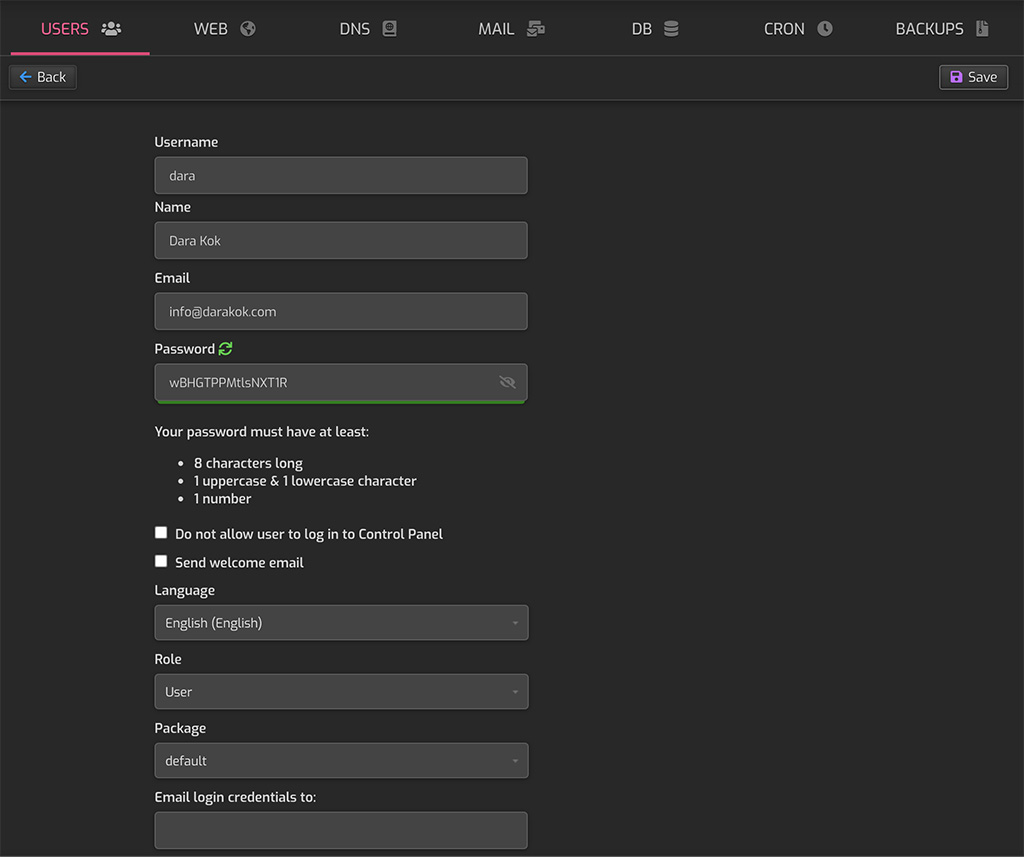
Let’s create a new user for our WordPress website. Go to USERS tab and hit Add User. Fill in the required information and hit Save.
Sign in as dara and create a new website by going to the WEB tab and click Add Web Domain.
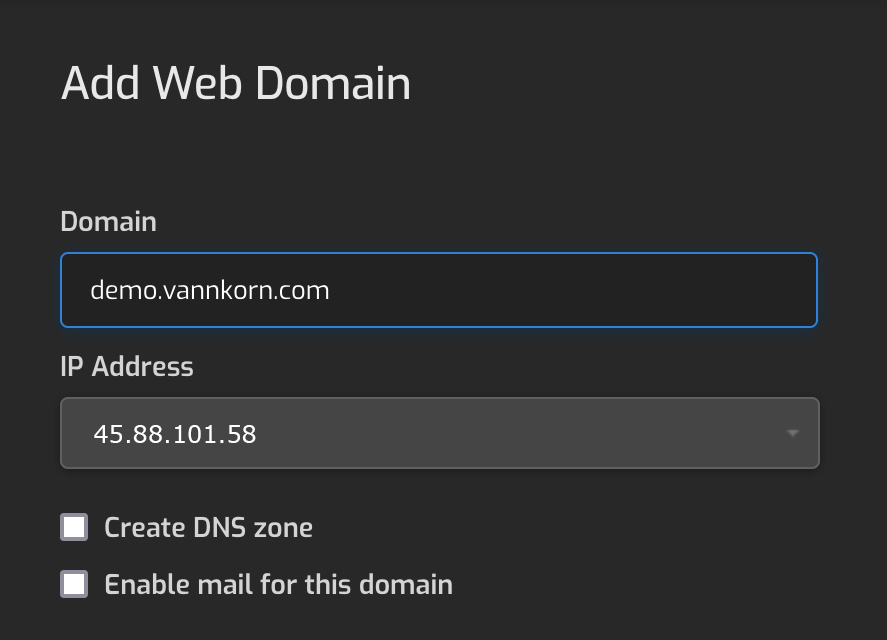
Hit Save to create the web domain demo.vannkorn.com for the IP address 45.88.101.58.
In order to make this subdomain work, log in to the Vultr dashboard and go to DNS, find the top level domain you wish to create a subdomain for (in my case, vannkorn.com) and click edit.
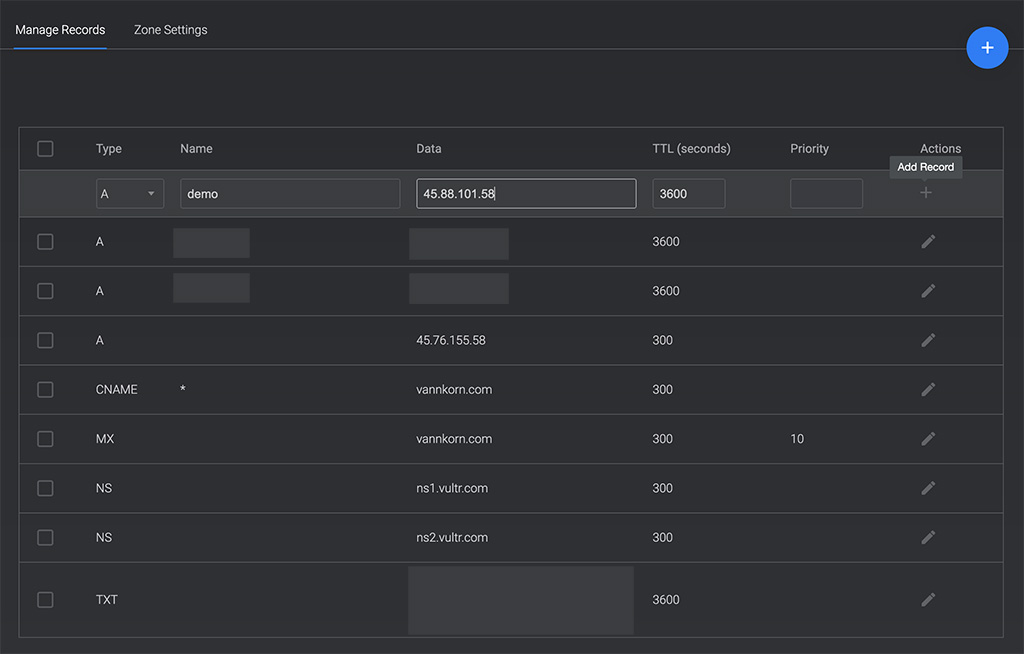
Under Type select A record and under the Name option, add demo. Under Data section enter the IP address of our instance. In my case the IP is 45.88.101.58. Hit the plus icon to save the option, and after a while the subdomain will be ready.
After the subdomain is fully propagated (to verify you may ping the domain in the terminal. If it matches the IP address, it’s fully propagated), we can enable HTTPs for this domain by using Lets Encrypt that comes with Hestia CP.
Go back to the WEB tab and click on the domain demo.vannkorn.com. You’ll see more options like below:
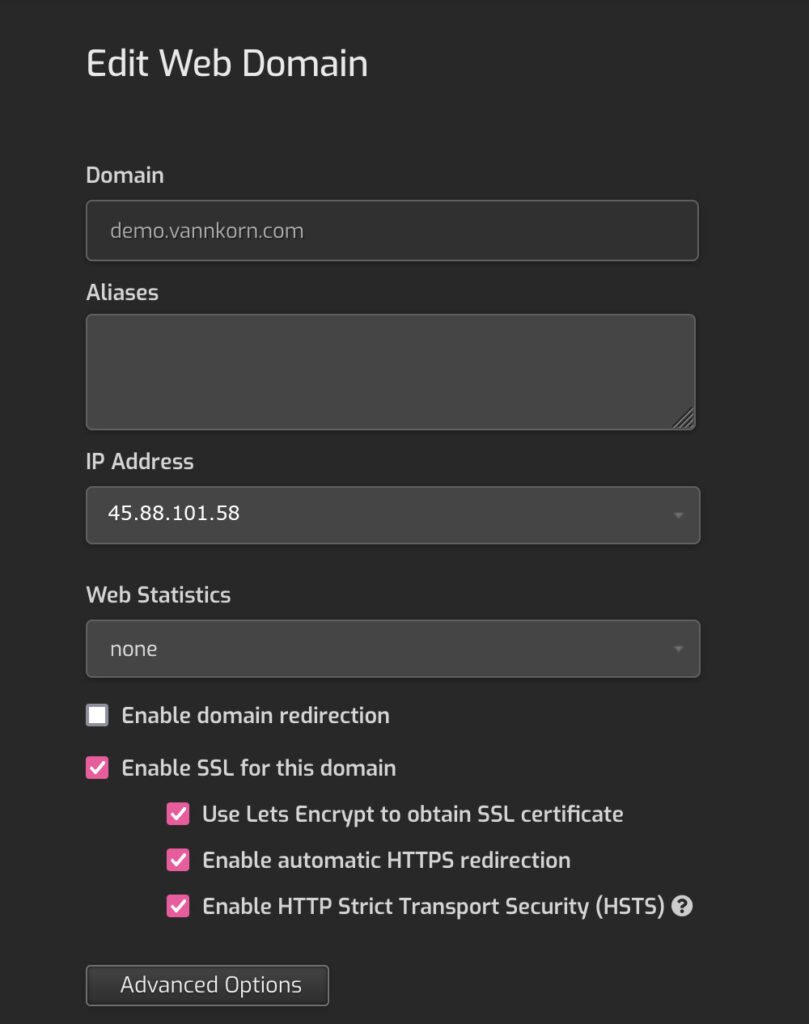
Tick the option Enable SSL for this domain and all its sub-options. The Use Lets Encrypt to obtain SSL certificate option will let Hestia CP install the corresponding certificate from Lets Encrypt. The Enable automatic HTTPS redirection option will help redirect your visitors from the unsecured HTTP protocol when they fail to type HTTPS or there’s a link without HTTPS to HTTPS. This option helps a lot in terms of SEO. With this option ticked, you will not need to bother writing any additional redirect code in your .htaccess file or installing a plugin to do so. The Enable HTTP Static Transport Security (HSTS) option protects our website from the man-in-the-middle attack.
The Advanced Options button below provides more options such as Web Template, Backend Template, Proxy Template, Proxy Extensions, Customize Document Root and FTP accounts.
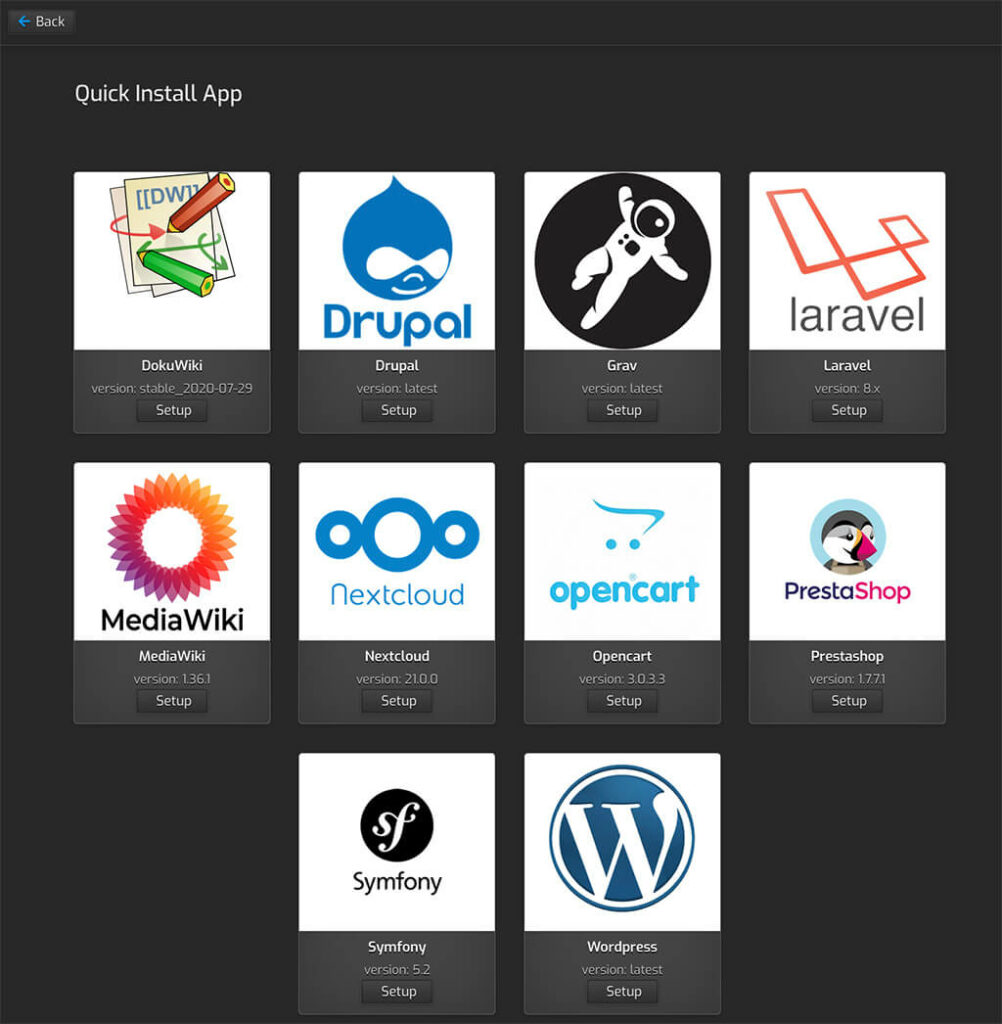
On the other hand, you may spot the Quick Install App button next to the Save button. The Quick Install App option provides a number of popular software to be step-by-step installed on the server.
Before installing the app, in this case, WordPress website, we first need to create a database. Go to the DB tab and click on Add New button. Fill in the required information and hit save.
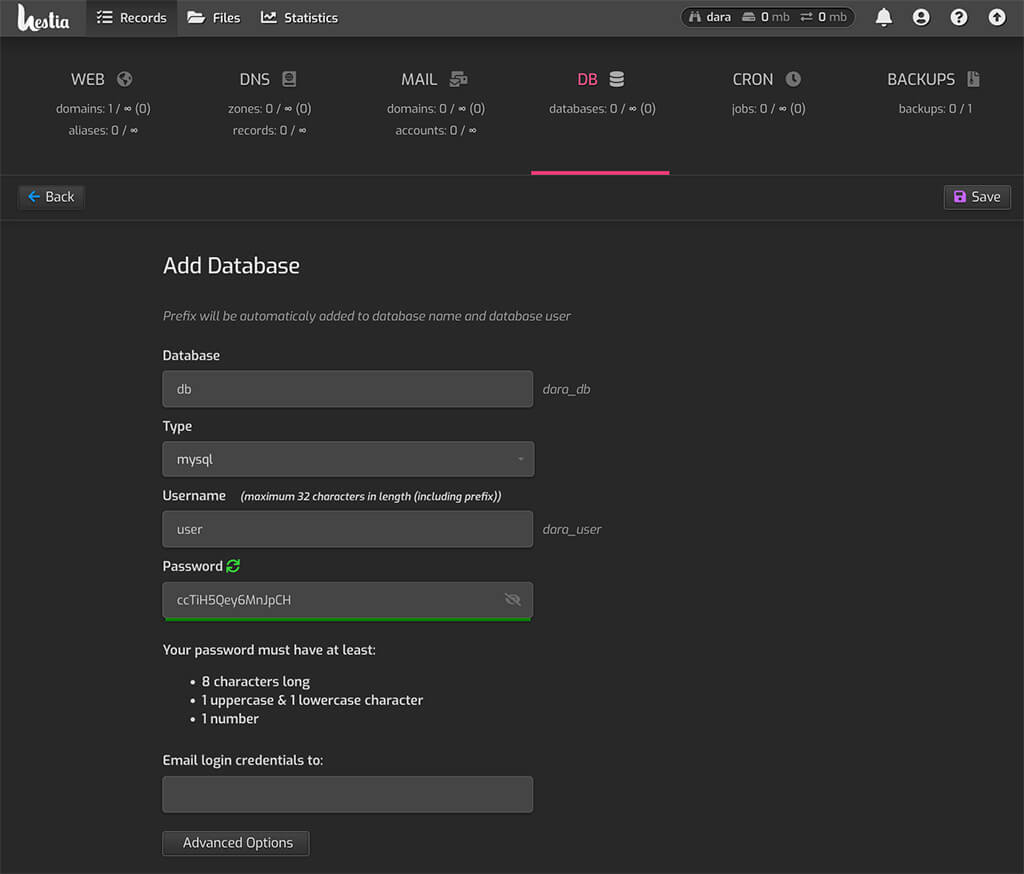
Take a note somewhere of the Database Name, Username, and Password for the WordPress installation that we’re gonna do this.
After everything is done, let’s go back to the Quick Install App option from the WEB tab earlier or simply log in to the server via SSH. In this tutorial, I’ll show you how to install WordPress via SSH instead of a step-by-step wizard.
Let’s login to our server via SSH type in the password you’ve created earlier.
ssh dara@45.88.101.58Every time you log into the server via SSH, I would recommend doing the update and upgrade packages for security reasons.
sudo apt update && apt upgradeNavigate to your website home directory at /home/dara/web/demo.vannkorn.com/public_html and removed the default index.html file that was generated earlier by Hestia:
cd /home/dara/web/demo.vannkorn.com/public_html

rm index.html
Download WordPress from WordPress Directory using wget:
wget https://wordpress.org/latest.tar.gzWhen the download completes, you will see the file wordpress.tar.gz there. Next, unzip the package by running the following command:
sudo tar -xvf wordpress.tar.gzWait until the unzipping process ends and move every file from the wordpress directory to the website root directory.
mv wordpress/* ../Remove the blank wordpress directory by:
rm -r wordpressNext, you will need to give ownership to all files to the current user, which is dara.
sudo chown -R dara:dara *Go to the web browser address bar and type in your website URL. In this tutorial, demo.vannkorn.com
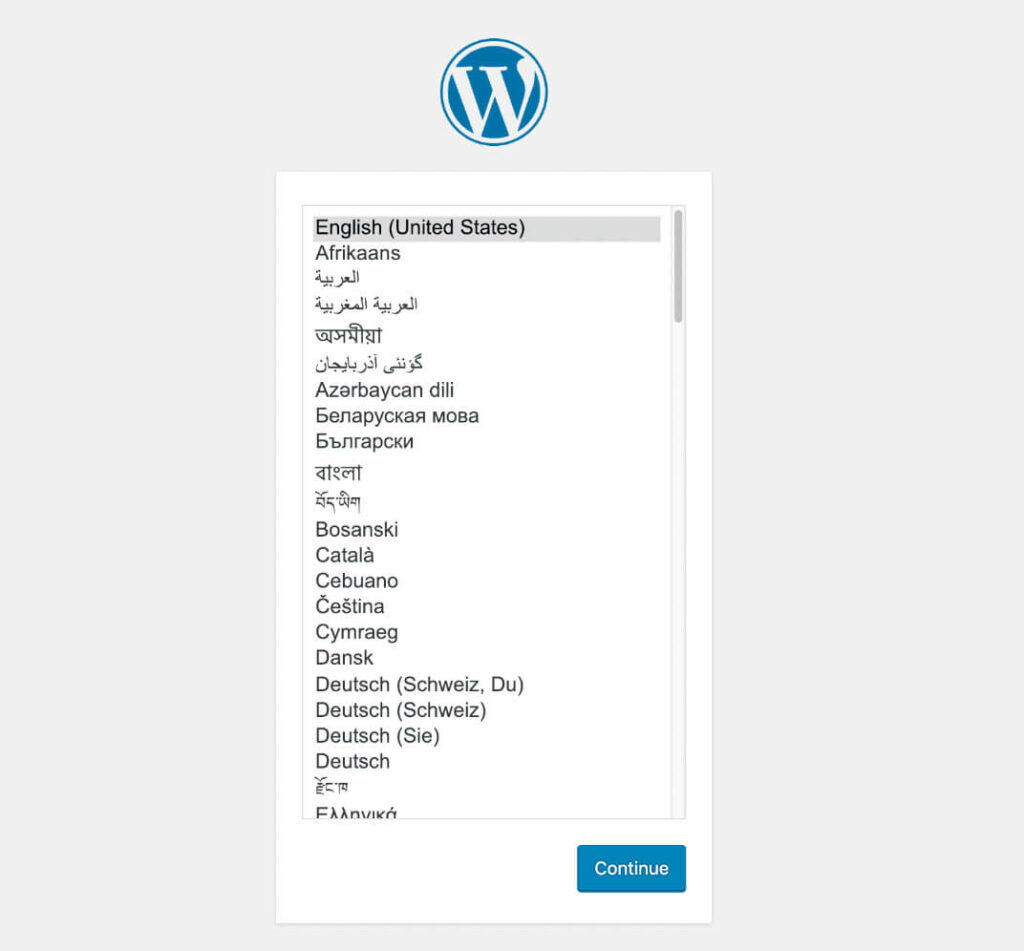
Follow the WordPress installation wizard using the Database credentials you’ve noted above.
And boom! You have successfully installed a WordPress website on a cloud VPS server using Hestia Control Panel.
Last but not least, If you spot any errors or there are some points that make you misunderstood, please let me know in the comment below.
I am regular visitor, how are you everybody? This article posted at this
web page is truly fastidious.